GUI Builder Tools for wxPython
Last Update : 08 Nov, 2022In this tutorial, you will learn to develop wxPython GUI applications using GUI development IDEs.
When you are trying to make a good-looking GUI by manual coding, It can be tedious. A Visual GUI designer tool is a good solution for that. It is always handy to use. There are many GUI development IDEs that can be used to develop GUI using wxPython. The examples of that are as follows.
- wxFormBuilder
- wxGlade
- wxDesigner
- gui2py
- BoaConstructor
This tutorial discusses wxFormBuilder GUI development IDE.
wxFormBuilder is an open-source, cross-platform WYSIWYG GUI builder. It can translate the wxWidget GUI design into C++, Python, PHP, or XML format.
A basic introduction to wxFormBuilder usage is as follows.
You can download the latest version of wxFormBuilder using this URL. http://sourceforge.net/projects/wxformbuilder/. First, Download and install wxFormBuilder to follow this tutorial.
When opening the wxFormBuilder application, you can appear a new project with a blank grey area at the center.
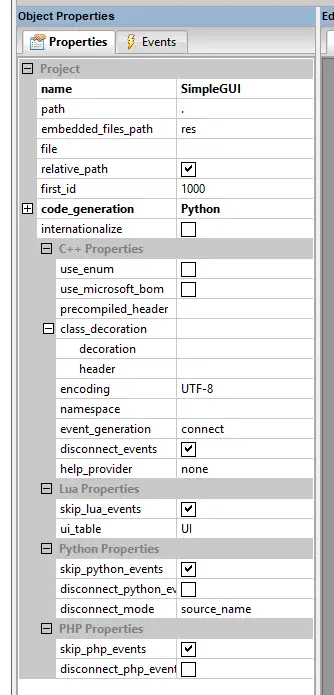
Now you can give a suitable name for your project and select Python as the code generation language using the Object properties window of wxFormBuilder. Look at the following image to get an idea about these settings.
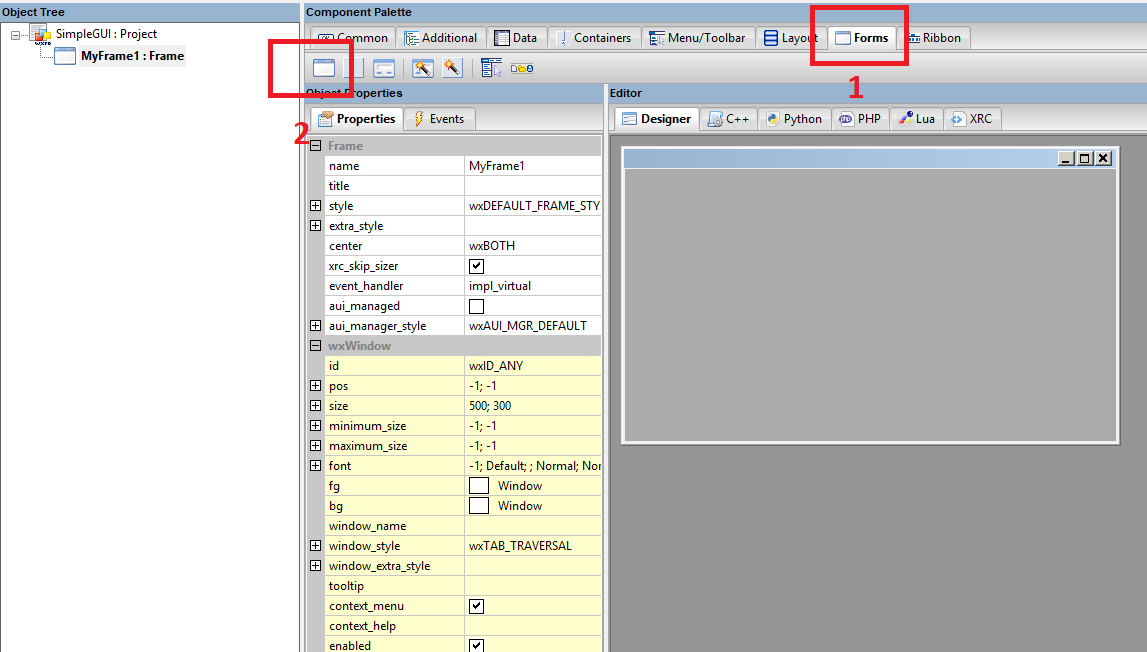
Next, you need to create a Frame for our project. For that, select from the "Forms" tab of the components palette, and choose "Frame".
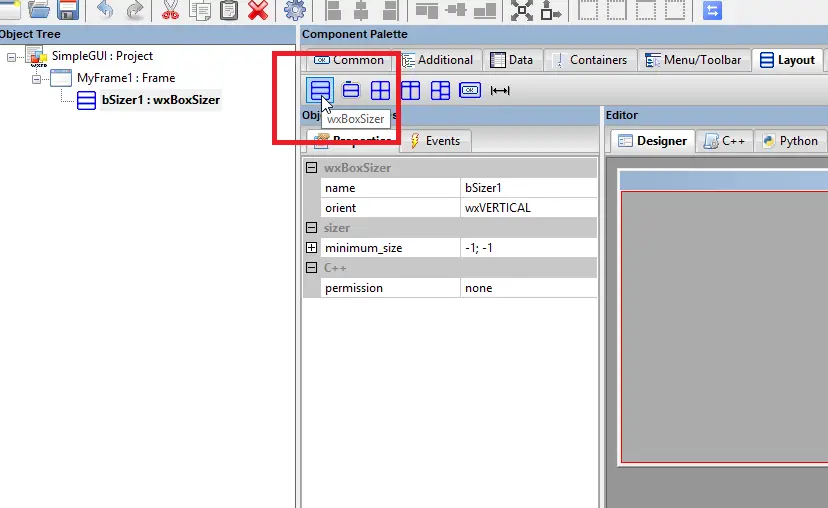
Now add a vertical wxBoxSizer from the "Layouts" tab. It is typically in a row or a column or several hierarchies of either.
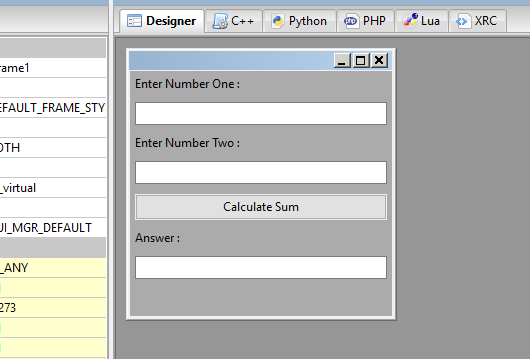
This is the time to create your own GUI. Add necessary controls in the wxBoxSizer with suitable captions. This example uses the following widgets.
- Three StaticText objects (labels)
- Three TextCtrl objects (text boxes)
- One wxButton object (button)
Make your GUI just like the following Image.
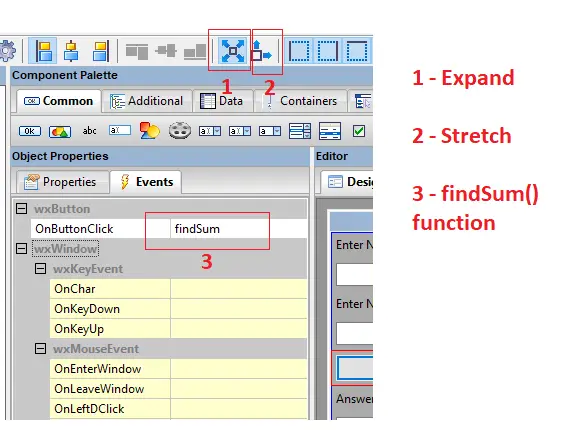
You can Expand and Stretch for these added controls. Also, In the object properties for the wxButton object, assign a function findSum() to OnButtonClick event.
Now you can save your Python project and generate Python code by pressing the F8 button on your keyboard.
Let's name generated python file as "example.py".
In the executable Python script, You need to import example.py and define findSum() function. Declare the application object and start the main event loop. Following is the executable code.
import wx
#import the newly created wxPython GUI file
import example

class CalcFrame(example.MyFrame1):
   def __init__(self,parent):
      example.MyFrame1.__init__(self,parent)

   def findSum(self,event):
      num1 = int(self.num1.GetValue())
      num2 = int(self.num2.GetValue())
      self.answer.SetValue (str(num1 + num2))

app = wx.App(False)
frame = CalcFrame(None)
frame.Show(True)
# Start the applications
app.MainLoop()
Following is the output of the above code :
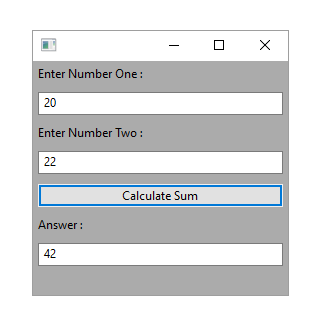
Now you have successfully created a simple GUI application using Python, wxPython, and wxFormBuilder tool.